Last updated on August 12th 2016.
2. Creating a New Project
The necessary first step, whether for starting a new inversion or migrating an
already existing inversion to LASIF, is to create a new project with the
lasif init_project command. In this tutorial we will work with a
project called Tutorial. The lasif init_project command will
create a new folder in whichever directory the command is executed in.
$ lasif init_project Tutorial

Initialized project in:
    /Users/lion/workspace/temp/LASIF_Tutorial/Tutorial
This will create the following directory structure. A LASIF project is defined by the files it contains. All information it requires will be assembled from the available data. In the course of this tutorial you will learn what piece of data belongs where and how LASIF interacts with it.
Tutorial
├── ADJOINT_SOURCES_AND_WINDOWS
│   ├── ADJOINT_SOURCES
│   └── WINDOWS
├── CACHE
│   ├── config.xml_cache.pickle
│   ├── event_cache.sqlite
│   └── statistics
├── DATA
├── EVENTS
├── FUNCTIONS
│   ├── __init__.py
│   ├── preprocessing_function.py
│   ├── process_synthetics.py
│   ├── source_time_function.py
│   └── window_picking_function.py
├── ITERATIONS
├── KERNELS
├── LOGS
├── MODELS
├── OUTPUT
├── STATIONS
│   ├── RESP
│   ├── SEED
│   └── StationXML
├── SYNTHETICS
├── WAVEFIELDS
└── config.xml
2.1. Configuration File
Each project stores its configuration values in the config.xml file; the location of this file also determines the root folder of the project. It is a simple, self-explanatory XML format. Please refer to the comments in the XML file to infer the meaning of the different settings. Immediately after the project has been initialized, it will resemble the following:
<?xml version='1.0' encoding='UTF-8'?>
<lasif_project>
  <name>Tutorial</name>
  <description></description>
  <download_settings>
    <seconds_before_event>300</seconds_before_event>
    <seconds_after_event>3600</seconds_after_event>
    <interstation_distance_in_m>1000.0</interstation_distance_in_m>
    <channel_priorities>
      <priority>BH[Z,N,E]</priority>
      <priority>LH[Z,N,E]</priority>
      <priority>HH[Z,N,E]</priority>
      <priority>EH[Z,N,E]</priority>
      <priority>MH[Z,N,E]</priority>
    </channel_priorities>
    <location_priorities>
      <priority></priority>
      <priority>00</priority>
      <priority>10</priority>
      <priority>20</priority>
      <priority>01</priority>
      <priority>02</priority>
    </location_priorities>
  </download_settings>
  <domain>
    <global>false</global>
    <domain_bounds>
      <minimum_longitude>-20</minimum_longitude>
      <maximum_longitude>20</maximum_longitude>
      <minimum_latitude>-20</minimum_latitude>
      <maximum_latitude>20</maximum_latitude>
      <minimum_depth_in_km>0.0</minimum_depth_in_km>
      <maximum_depth_in_km>200.0</maximum_depth_in_km>
      <boundary_width_in_degree>3.0</boundary_width_in_degree>
    </domain_bounds>
    <domain_rotation>
      <rotation_axis_x>1.0</rotation_axis_x>
      <rotation_axis_y>1.0</rotation_axis_y>
      <rotation_axis_z>1.0</rotation_axis_z>
      <rotation_angle_in_degree>-45.0</rotation_angle_in_degree>
    </domain_rotation>
  </domain>
  <misc_settings>
    <time_frequency_adjoint_source_criterion>
        25.0
    </time_frequency_adjoint_source_criterion>
  </misc_settings>
</lasif_project>
The nature of SES3D’s coordinate system has the effect that simulation is most
efficient in equatorial regions. Thus it is often advantageous to rotate
the frame of reference so that the simulation happens close to the equator.
A one chunk simulation with SPECFEM3D GLOBE does not suffer from this limitation,
but a domain can still only be specified by minimum and maximum extents as it
works with spherical sections.
LASIF first defines the simulation domain; the actual simulation happens
there (only when using SES3D; SPECFEM3D GLOBE directly simulates in the
rotated domain). Optional rotation parameters define the physical location of
the domain. The coordinate system for the rotation parameters is described in
lasif.rotations. You will have to edit the config.xml file to
adjust it to your region of interest.
LASIF handles all rotations necessary so the user never needs to worry about these. Just keep in mind to always keep any data (real waveforms, station metadata and events) in coordinates that correspond to the physical domain and all synthetic waveforms in coordinates that correspond to the simulation domain.
Warning
A one chunk simulation in SPECFEM3D GLOBE is not exactly identical with the domain definition in LASIF. A SES3D (and LASIF) domain is defined in geographical coordinates whereas a cubed sphere chunk uses great circles on all boundaries. This is not a big limitation - just keep in mind that the domain in SPECFEM is a bit smaller at the corners than the LASIF domain. If this becomes an issue, let us know and we’ll add some more logic to LASIF.
For this tutorial we are going to work in a rotated domain across Europe.
Please change the config.xml file to reflect the following domain
settings.
- Latitude:
-10.0° - 10.0° - Longitude:
-10.0° - 10.0° - Depth:
0 km - 471 km - Boundary width in degree:
2.5° - Rotation axis:
1.0, 1.0, 0.2 - Rotation angle:
-65.0°
In general, one should only work with data not affected by the boundary
conditions. SES3D utilizes perfectly matched layers boundary conditions (PML).
It is not advisable to use data that traverses these layers. SES3D defaults
to two layers but more are possible. For this tutorial we will only consider
data which is at least three elements away from the border in a an attempt
to avoid unphysical influences of the boundary conditions. This amounts to
2.5°.
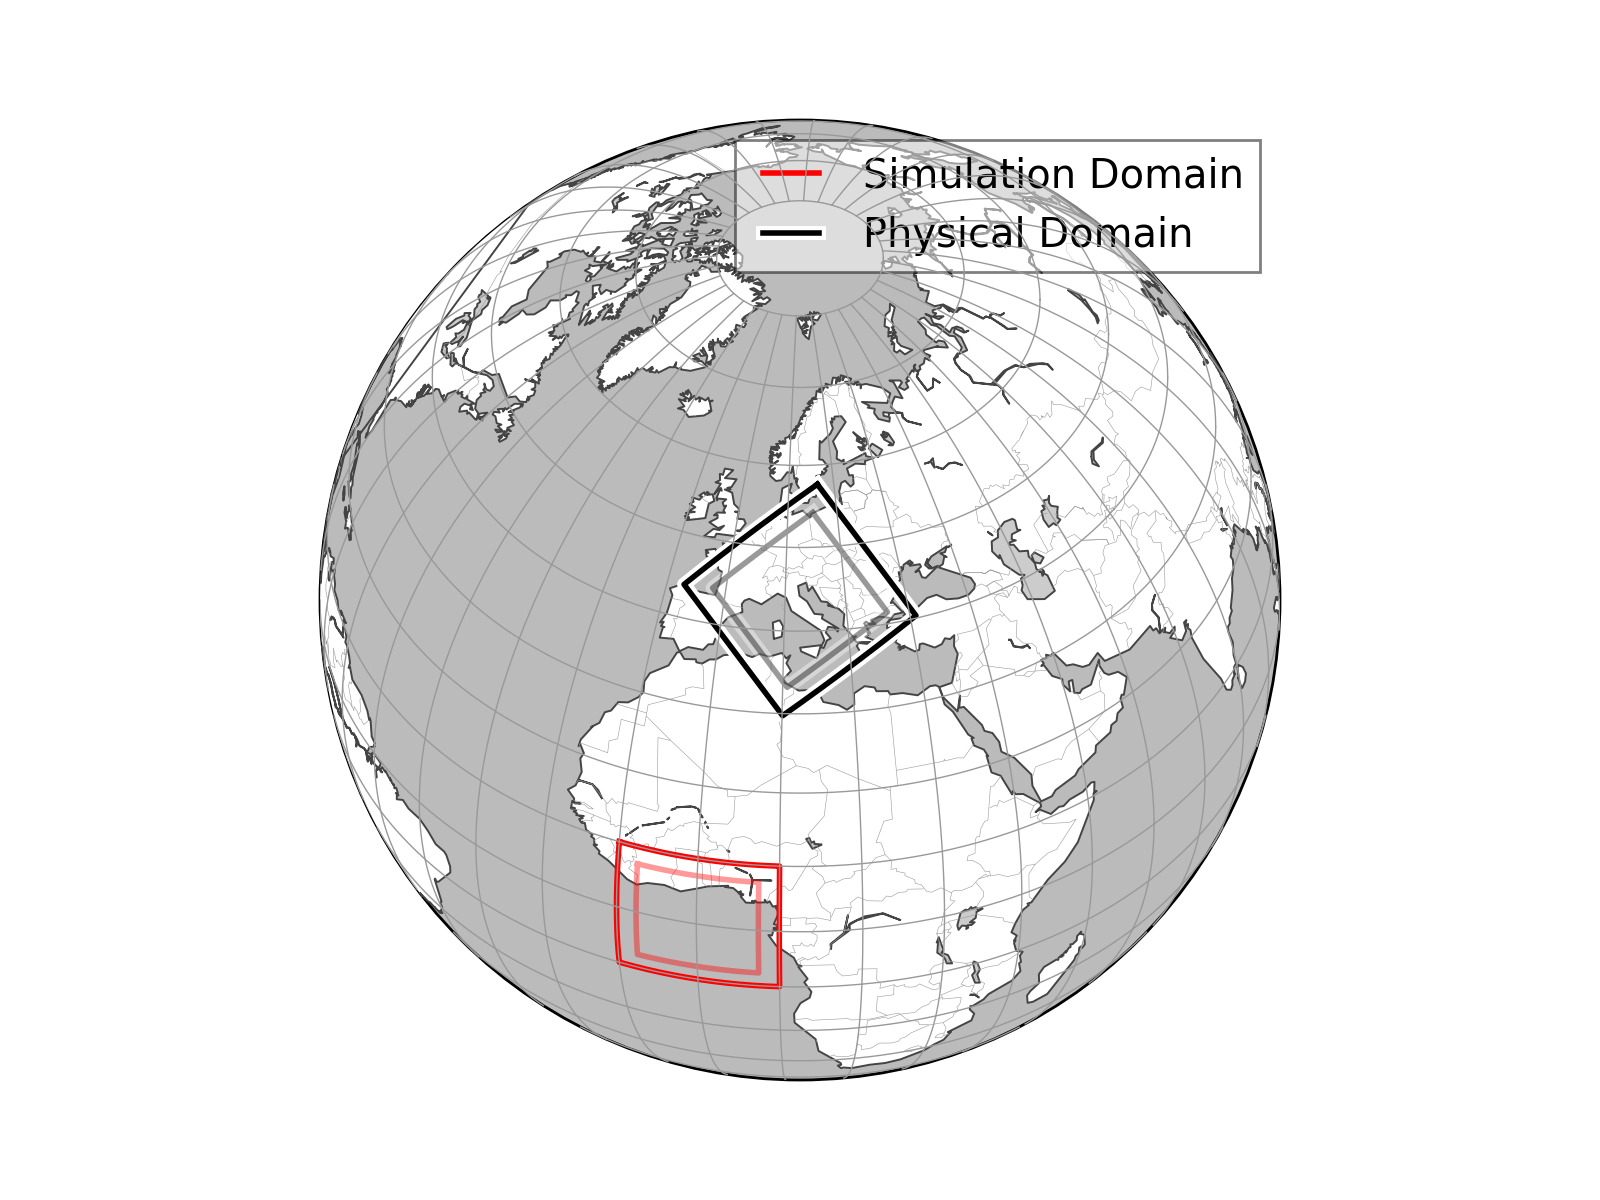
At any point you can have a look at the defined domain with
$ lasif plot_domain
This will open a window showing the location of the physical domain and the simulation domain. The inner contour shows the domain minus the previously defined boundary width.
(Source code, png, hires.png, pdf)

Note
The map projection and zoom should automatically adjust so that it is suitable for the dimensions and location of the chosen domain. If this is not the case, please file an issue on the project’s Github page.